
If you own an older home or building, you might be concerned about hidden hazards like asbestos, lead paint, or mold. These materials can pose serious health risks to you, your family, or your tenants. The good news is that testing is easier than you might think.
Testing gives you the information you need to protect yourself and make smart decisions about your property. Skipping these assessments puts building occupants at risk and could lead to costly fines if you’re planning construction work.
At Atlas Labs, Inc., we’ve spent over 8 years helping property owners identify environmental hazards in their homes and buildings. We understand the worry that comes with not knowing what’s lurking behind your walls or under your floors. That’s why we’ve put together this guide to help you understand how to take samples safely and effectively.
How to Take an Asbestos Sample Safely
- Before you start, gather your supplies. You’ll need disposable gloves, a disposable dust mask (N95 or better), a spray bottle with water, a utility knife or similar tool, sealable plastic bags like Ziploc bags, permanent markers for labeling, and plastic sheeting to protect the area.
- Prepare the area. Turn off any fans or HVAC systems that could spread fibers through the air. Lay down plastic sheeting under the area you’ll be sampling. This catches any debris that falls during collection.
- Wet the material before cutting or scraping. Misting the surface with water helps keep fibers from becoming airborne. This simple step makes a big difference in keeping you safe.
- Collect your sample by cutting or scraping a small piece of the material. For most materials, you’ll need a sample about the size of a quarter or a small tablespoon. Make sure you get through all layers of the material so the lab can test everything. For floor tiles, include both the tile and the adhesive underneath. For pipe insulation, try to get material from the outer covering through to the pipe surface.
- Seal everything up immediately after collection. Place the sample in your sealable plastic bag right away. Wipe down the area where you collected the sample with a damp paper towel and dispose of it in another sealed bag. This prevents any loose fibers from spreading.
Where to Find Asbestos
If your building was constructed before 1989, check areas like popcorn or textured ceilings, vinyl floor tiles, pipe insulation and wrapping, roofing shingles and felt, wall insulation, and patching compounds. Materials that are damaged, deteriorating, or crumbling are the most important to test because they’re more likely to release dangerous fibers into the air.
Recommended Sample Sizes
For asbestos samples, aim for about a tablespoon of material or a piece roughly the size of a quarter. Make sure you’re collecting from all layers if the material has multiple components, like flooring with adhesive underneath.
How to Collect a Lead Paint Sample
- Gather your materials before starting. You’ll need disposable gloves, sealable plastic bags, a utility knife or paint scraper, plastic sheeting, and a permanent marker for labels.
- Prepare the collection area by placing plastic sheeting under the spot you’re sampling. This catches paint chips and makes cleanup easier. Lead dust is just as dangerous as lead paint, so controlling where chips fall matters.
- Choose your sampling location carefully. Focus on areas with peeling, chipping, or deteriorating paint. Window sills, door frames, and friction surfaces where paint rubs are common problem spots. If you’re testing multiple rooms or surfaces, collect separate samples from each area.
- Collect paint chips by carefully scraping or cutting through all layers of paint down to the underlying surface. You want to capture every layer because lead paint might be hidden under newer coats. A sample about the size of a postage stamp or a teaspoon of chips is typically enough for testing.
- For intact paint, you’ll need to cut through the paint carefully to get chips without creating excessive dust. Work slowly and deliberately. If the paint is in very poor condition and crumbling easily, be extra careful to contain all the debris.
- Package samples immediately in your sealable bags and label them clearly. Note the exact location each sample came from, such as the front bedroom windowsill or kitchen door frame. This information helps you understand your results and plan any remediation work.
Where to Find Lead
Focus your attention on window sills and frames, door frames and trim, walls in older rooms, baseboards, and exterior siding. Paint that is peeling, chipping, or flaking should be your top priority for testing.
Recommended Sample Sizes
For lead paint samples, a teaspoon of paint chips or a piece about the size of a postage stamp usually provides enough material. Include all paint layers down to the base surface.
How to Take a Mold Sample for Testing
- Prepare your supplies, including disposable gloves, an N95 mask, sealable plastic bags, sterile swabs or tape lift kits (available at hardware stores), and a permanent marker.
- Protect yourself first. Mold spores can trigger allergic reactions and respiratory issues in some people. Wear your mask and gloves throughout the collection process. If you’re sensitive to mold or have respiratory conditions, consider having a professional collect samples instead.
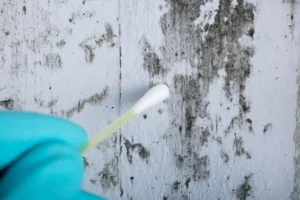
- For visible mold growth, you have two main options: swab sampling and tape lift sampling. For swab sampling, start with rubbing a sterile swab across the moldy surface in a zigzag pattern. Then cover an area of about two to four square inches. Place the swab in your sealable bag immediately. For tape lift sampling, use clear tape pressed firmly against the moldy surface. The tape picks up mold spores and fragments. Place the tape sticky-side down on a clean piece of paper, then put both in your sealable bag.
- For suspected mold in materials, collect a bulk sample. This works well for drywall, wood, carpet, or other building materials that might be contaminated. Cut or scrape a piece about the size of a half-dollar or a tablespoon of material. Make sure to include the area with visible growth or discoloration.
- Label each sample with the collection date, exact location in your building, and any notes about conditions like moisture or water damage nearby. This information helps the lab understand the context of your sample and helps you make sense of the results.
Where to Find Mold
Mold grows wherever moisture collects. So look for it in bathrooms and kitchens, basements and crawl spaces, around windows with condensation, near plumbing fixtures or leaks, attics with poor ventilation, and anywhere you’ve had water damage.
You might see visible discoloration on surfaces, or you might just notice a musty smell. Both are good reasons to test.
Recommended Sample Sizes
For mold samples, swab an area of two to four square inches for surface testing. Bulk samples should be about the size of a half-dollar or a tablespoon of material.
Schedule Your Environmental Testing Today!
Leave your information below and we will be in touch!

Leave your information below and we will be in touch!
"*" indicates required fields
How to Store and Label Your Samples Properly
- Label each sample bag with the sample number you’ll use on your chain of custody form, a clear description of the material (like basement ceiling texture or kitchen window frame paint), the date you collected it, and the address or project location. Make sure your labels are legible and won’t smear or rub off during transport. Permanent markers work best on plastic bags. Attach labels securely so they can’t fall off.
- Store samples in sealable plastic bags, like Ziploc bags to prevent contamination. Each sample should have its own bag. Don’t mix materials from different locations in the same container. For extra protection, especially when transporting multiple samples, place individual sample bags inside a larger sealable bag.
- Keep samples dry and store them at room temperature until you can drop them off. Avoid leaving samples in hot cars or exposing them to moisture. Most samples remain stable for several days when stored properly, but submitting them sooner is always better.
The Drop-Off Process with Atlas Labs, Inc.
- Make sure your drop-off package includes your samples in sealed bags and a completed chain of custody form.
- Fill out the chain of custody form completely with the date and time of collection, project or location details, your email address and phone number, and your signature.
- Package everything securely by placing your labeled sample bags and completed chain of custody form inside a larger sealable plastic bag.
- Make your payment for testing services by calling us. Payments cannot be processed at the drop box locations.
What Happens Afterward?
After you submit your samples, our certified lab analyzes them using precise techniques. We identify the presence and types of asbestos fibers, measure lead concentration levels, and classify mold species and spore counts.
Results typically arrive via email within a few days, though we offer rush service with same-day results for urgent situations. Our reports tell you exactly what was found and where, giving you the information you need to make decisions.
If your results show hazardous materials, don’t panic. Many buildings contain asbestos, lead paint, or mold that can be safely managed or removed. Our team can advise you on your options, whether that means monitoring undisturbed materials, encapsulating them, or pursuing abatement.
When to Call the Professionals for an On-Site Visit
While collecting samples yourself works well in many situations, some circumstances call for professional help:
- Large or complex projects: If you’re planning major renovations or demolition, professionals can identify all potential hazard locations and ensure compliance with regulations. In Oregon, an asbestos survey is required before any demolition or renovation on commercial buildings and residential buildings built before 2004. Washington State requires surveys before any work that could disturb asbestos-containing materials, regardless of building age.
- Severely damaged materials: If asbestos-containing materials are crumbling or deteriorating badly, disturbing them for sampling could release dangerous fibers. Similarly, extensive lead paint deterioration or large mold infestations often require professional remediation beyond simple testing.
- Air quality concerns: If you suspect airborne contamination but can’t find a visible source, professional air sampling provides answers that surface testing can’t.
At Atlas Labs, Inc., we offer professional survey services throughout Oregon and Washington State. Our specialists know exactly where to look and use specialized equipment like optical analyzers for asbestos and XRF analyzers for instant lead readings.
Get the Answers You Need
Testing gives you facts instead of worries, and facts let you take appropriate action. Preserving the health of you and your building’s occupants is our primary objective at Atlas Labs, Inc..
With over 50 years of experience, we know how to spot and assess environmental risks in homes, offices, and commercial spaces. Whether you collect samples yourself or have our team perform a comprehensive survey, we’re here to help you understand your building and protect the people inside it.
Contact us today for more information about testing services, drop-off locations, or to schedule a professional inspection.