
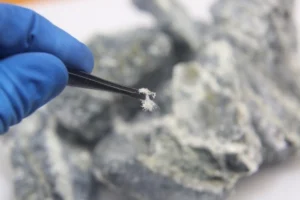
 Planning a renovation project? Before you swing that hammer or tear out old flooring, you need to know what you’re dealing with. Asbestos isn’t something you can identify just by looking at it. The fibers are microscopic, and materials that contain asbestos look identical to materials that don’t.
In Oregon, asbestos testing is required for all pre-2004 construction. In Washington, it’s required for every renovation project, regardless of when the building was constructed. These rules exist for good reason. Asbestos fibers, when disturbed, can cause serious health problems including lung cancer and mesothelioma.
Atlas Labs, Inc. makes it easy to get the answers you need. Our sample drop-off locations throughout Portland, Salem, St. Helens, and Vancouver allow you to submit samples on your schedule. We’ll analyze them in our Asbestos Hazard Emergency Response Act (AHERA)-certified laboratory and get your results back fast, with same-day rush options available when you need them.
One important note: if you’re working with a contractor on your renovation project, they are required to show that samples were collected by an AHERA-certified inspector. This is the law in both Oregon and Washington. All of our inspectors hold this certification.
However, if you’re a home or business owner doing your own investigation before a project begins, you can collect and submit samples yourself using our drop-off locations.
Schedule Your Environmental Testing Today!
Leave your information below and we will be in touch!

Leave your information below and we will be in touch!
"*" indicates required fields
Steps to Follow
-
Gather your supplies before you start.
Before you begin collecting an asbestos sample, make sure you have everything you need within arm’s reach. Stopping mid-collection to find supplies increases the chance of spreading fibers.
You’ll need:
- Disposable gloves
- Dust mask rated N95 (or higher)
- Spray bottle filled with water
- Utility knife (or similar cutting tool)
- Sealable plastic bags (like Ziploc bags)
- Permanent marker for labeling
- Plastic sheeting to protect the floor beneath your work area
- Damp paper towel for cleanup
Some people prefer using a coring tool instead of a knife, especially for textured ceilings. A half-inch hollow punch cutter creates a clean plug with minimal disturbance. This tool works particularly well on popcorn ceilings, where blade cutting tends to drag material across a wider area.
-
Prepare the area for safe sampling.
Preparation takes only a few minutes but makes a significant difference in your safety.
- Start by turning off any fans, air conditioning, or heating systems that serve the room. Airflow spreads fibers, so you want the air as still as possible during collection.
- Lay plastic sheeting on the floor directly beneath where you’ll be sampling. This catches any debris that falls during collection. If you’re sampling from a ceiling, the sheeting becomes even more important since gravity will pull loose particles downward.
- Close any doors to the room and, if possible, close HVAC registers manually. The goal is to create a contained environment for the few minutes you’ll be working.
-
Take an asbestos sample safely.
- Put on your gloves and dust mask before you touch anything. If you’re using goggles, put those on too. Check that your mask fits snugly against your face with no gaps around the edges.
- Mist the suspect material with water before you cut or scrape. Spray a circle about three to four inches wide and wait thirty seconds to let the water absorb. This simple step suppresses fiber release during cutting.
- For popcorn ceilings and other porous textures, spray more generously and wait a full sixty seconds. The EPA specifies wet suppression as the primary exposure control for bulk sampling.
Now collect your sample:
- Cut or scrape a small piece of the material, about the size of a quarter for most materials. The important thing is to get through all layers so the lab can test everything present.
- For a popcorn ceiling, this means cutting through the texture down to the drywall beneath.
- For floor tiles, include both the tile and the mastic (glue) underneath. For wallboard, capture the painted surface, any texture, tape, joint compound, and the gypsum board itself.
- Use a single controlled stroke rather than sawing back and forth. Less disturbance means fewer fibers in the air.
- Drop the sample directly into your sealable plastic bag. Don’t handle it with bare hands. Seal the bag immediately.
- After collection, cover the spot where you took your sample. Apply spackle or duct tape over the cut right away. The goal is to cover any exposed fibers at the cut edge so they can’t become airborne later.
- Wipe the immediate work area with a damp paper towel. Do not use a vacuum. Standard household vacuums spread fibers rather than contain them.
- Place the paper towel in a sealed plastic bag along with your used gloves. Remove your dust mask and wash your hands thoroughly before leaving the room.
Guidance for Specific Materials
Flooring
Sample from the top down to the subfloor.
A sheet vinyl floor typically has three layers: the upper vinyl surface, a felt backing, and mastic. Floor tiles usually have two layers: the tile and the mastic. Sometimes there’s a leveling compound or vapor barrier underneath.
So include everything from the surface down to the wood subfloor. A hammer and wood chisel work well for this, as does a carpet blade.
Popcorn Ceilings
These crumbly textures release fibers faster than denser materials once any surface is broken.
Wet the area generously, use a coring tool if possible, and work slowly. Because popcorn texture isn’t always applied evenly throughout a building, consider taking two or three samples from different areas, especially if part of the structure was an addition built at a different time. Then bag each sample separately.
Wallboard & Drywall
Sample from an inside corner where two pieces of drywall meet. This gives you access to the joint compound and tape in addition to the painted surface and gypsum board.
As with popcorn ceilings, textures and joint compounds may vary across a room, so multiple samples from different spots provide more reliable results.
Plaster Systems
These may have a fine painted texture on the surface, followed by a coarser scratch coat over wood lathe and metal screen. You don’t need to include the wood or metal in your sample, but do your best to keep the paint and plaster layers together.
How to Drop Off an Asbestos Sample at Atlas Labs, Inc.
After collecting your sample, you’re ready to visit one of our asbestos sample drop off locations.
It must include two things: your sample in a sealed bag, and a completed chain of custody form. The chain of custody is essential for processing your sample accurately and getting your results back to you.
- Write the sample number and a description of the material directly on the bag with a permanent marker. Make sure the label is clear and legible. If you’re submitting multiple samples, number them and label each one.
- Fill out every field on the form, including the date and time, your project location details, your email address, phone number, and signature. Forms are available at all of our drop-off locations. However, we recommend printing and pre-filling the form before you arrive. This ensures your contact information is clear and speeds up processing. You can find the form on our website.
- Place your labeled sample bag and completed chain of custody form inside a larger sealable plastic bag. Make sure the outer bag is properly sealed to prevent contamination or loss during the drop-off process. Most of our locations have sample bags available, but we recommend bringing your own sealable bag for a secure, contamination-free submission.
- Testing fees can only be paid at Atlas Labs, Inc. locations, either by calling in or walking in. Payment cannot be processed at drop box locations.
What Happens After Submitting a Sample?
Once your sample reaches our AHERA-certified, Polarized Light Microscopy (PLM) testing laboratory, our team gets to work. We offer several turnaround options depending on how quickly you need results: rush service (with a 2 PM same-day deadline), next-day, two-day, and five-day options. Faster results do come at a higher cost, but they’re available when your project timeline demands it.
Your results will report asbestos as a percentage by weight. A result below one percent does not meet the regulatory definition of an asbestos-containing material under federal standards, which means you can proceed with your renovation work. A result of one percent or higher means the material is regulated and requires licensed abatement before any planned disturbance.
Keep your lab report regardless of the result. This documentation protects you during real estate transactions, insurance claims, and any future questions about the property.
Rely on Atlas Labs, Inc. for Answers
With multiple drop-off locations across Oregon and Washington, fast turnaround times, and a certified laboratory that meets EPA, DEQ, and OSHA standards, Atlas Labs, Inc. makes the testing process simple.
If you have questions about how to collect an asbestos sample, how to drop off an asbestos sample, or anything else about the testing process, don’t hesitate to contact us. Our team is here to help you get the answers you need so you can move forward with confidence.
Call us at 503-430-5290, fill out a contact form here, or find your nearest drop-off location today.